


DIY Ecolabel Paper Sizing (MAC)
Step 1 - Label Profile
Note: Complete these steps for each new label size you're setting up.
Let's begin by creating a new label profile. You can open any image or PDF using Preview, or you can open Text Edit and hit Print.

Once the Print dialogue box is open, set the TSC DA210 as the printer, and under Paper Size click Manage Custom Sizes.

Click '+', and then change the name Untitled to either Round Ecolabels, Square Ecolabels or Rectangle Ecolabels (depending on your chosen shape).
Set the Margins to TSC DA210.
Make sure to set the Non-Printable Area to 0 mm for all sides.
Set the Paper Size to the same dimensions of your labels: (width x height)
|
Label Size
|
Width x Height
|
|
Round 50 mm
|
50 mm x 50 mm
|
|
Round 75 mm
|
75 mm x 75 mm
|
| Oval | 70 mm x 45 mm |
|
Square
|
50 mm x 50 mm
|
|
Rectangle 50 mm
|
50 mm x 32 mm
|
|
Rectangle 100 mm
|
100 mm x 48 mm
|

Then click ok!
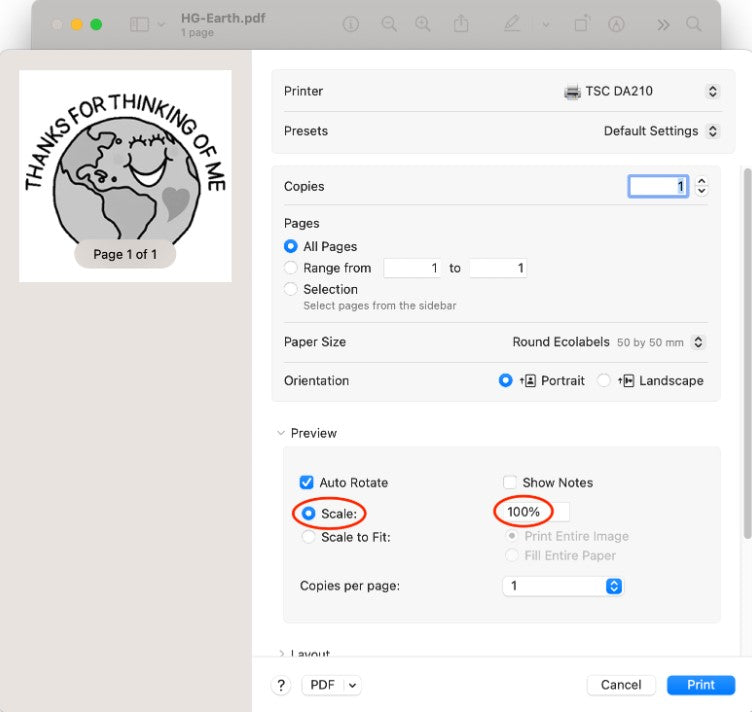
Step 2 - Print Position
Now that we have the paper size setup, let's adjust the print position.
Under Preview, set the Scale to 100%.
Step 3 - Save the Preset
Let's save the these settings for future prints!
At the top of the print dialogue box, go to Presets and select Save Current Settings as Preset.

Change the Preset Name to your liking, and click OK.

You're all set now. Yay!
When you're ready to print your designs, make sure you select Round, Square or Rectangle Ecolabels under Paper Sizes and hit print.